Store Data on Cell
- CKB dev environment: OffCKB (≥v0.4.0)
- JavaScript SDK: CCC (≥v0.0.14-alpha.0)
Tutorial Overview
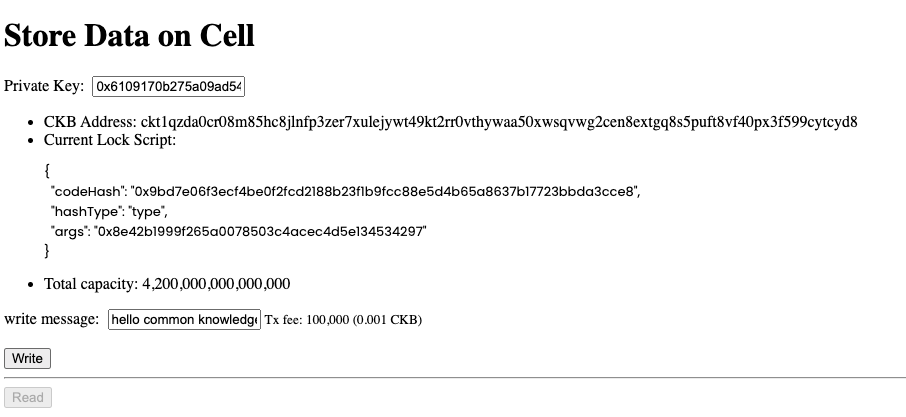
In this tutorial, you will learn how to tuck a nifty message - "Hello CKB!" - into a Cell on the CKB blockchain. Imagine it as sending a message in a bottle, but the ocean is digital, and the bottle is a super secure, tamper-proof CKB Cell!
As you learned from the first tutorial, Transfer CKB, a Cell can store any type of data in the data field of the Cell structure. Here, we will encode a text message as a hex string and store it in the data field. Once your words are encoded and inscribed into the blockchain, we'll get the hex string back from the same Cell and decode it to the original text message. The encoding and decoding method is up to you; we use TextDecoder for simplicity throughout the tutorial.
Setup Devnet & Run Example
Step 1: Download the Source Code
To get started with the tutorial dApp, clone the repository and navigate to the appropriate directory:
git clone https://github.com/nervosnetwork/docs.nervos.org.git --depth 1
cd docs.nervos.org/examples/dApp/store-data-on-cell
You can also read the full code online or download it here.
Step 2: Start the Devnet
To interact with the dApp, ensure that your Devnet is up and running. After installing @offckb/cli, open a terminal and start the Devnet with the following command:
- Command
- Response
offckb node
Launching CKB devnet Node...
CKB devnet RPC Proxy server running on http://127.0.0.1:28114
You might want to check pre-funded accounts and copy private keys for later use. Open another terminal and execute:
- Command
- Response
offckb accounts
Print account list, each account is funded with 42_000_000_00000000 capacity in the genesis block.
[
  {
    privkey: '0x6109170b275a09ad54877b82f7d9930f88cab5717d484fb4741ae9d1dd078cd6',
    pubkey: '0x02025fa7b61b2365aa459807b84df065f1949d58c0ae590ff22dd2595157bffefa',
    lockScript: {
      codeHash: '0x9bd7e06f3ecf4be0f2fcd2188b23f1b9fcc88e5d4b65a8637b17723bbda3cce8',
      hashType: 'type',
      args: '0x8e42b1999f265a0078503c4acec4d5e134534297'
    },
    address: 'ckt1qzda0cr08m85hc8jlnfp3zer7xulejywt49kt2rr0vthywaa50xwsqvwg2cen8extgq8s5puft8vf40px3f599cytcyd8',
    args: '0x8e42b1999f265a0078503c4acec4d5e134534297'
  },
  {
    privkey: '0x9f315d5a9618a39fdc487c7a67a8581d40b045bd7a42d83648ca80ef3b2cb4a1',
    pubkey: '0x026efa0579f09cc7c1129b78544f70098c90b2ab155c10746316f945829c034a2d',
    lockScript: {
      codeHash: '0x9bd7e06f3ecf4be0f2fcd2188b23f1b9fcc88e5d4b65a8637b17723bbda3cce8',
      hashType: 'type',
      args: '0x758d311c8483e0602dfad7b69d9053e3f917457d'
    },
    address: 'ckt1qzda0cr08m85hc8jlnfp3zer7xulejywt49kt2rr0vthywaa50xwsqt435c3epyrupszm7khk6weq5lrlyt52lg48ucew',
    args: '0x758d311c8483e0602dfad7b69d9053e3f917457d'
  },
  #...
]
Step 3: Run the Example
Navigate to your project, install the node dependencies, and start running the example:
- Command
- Response
npm install && NETWORK=devnet npm start
$ parcel index.html
Server running at http://localhost:1234
✨ Built in 66ms
Now, the app is running in http://localhost:1234
Behind the Scene
Open the lib.ts file in your project. It lists the important functions that do most of the work for the project.
Encode & Decode Message
Since a Cell's data field can store any type of data, we need to design an encoding and decoding method for the message we want to read and write on-chain.
export function utf8ToHex(utf8String: string): string {
  const encoder = new TextEncoder();
  const uint8Array = encoder.encode(utf8String);
  return (
    "0x" +
    Array.prototype.map
      .call(uint8Array, (byte: number) => {
        return ("0" + (byte & 0xff).toString(16)).slice(-2);
      })
      .join("")
  );
}

export function hexToUtf8(hexString: string): string {
  const decoder = new TextDecoder("utf-8");
  const uint8Array = new Uint8Array(
    hexString.match(/[\da-f]{2}/gi)!.map((h) => parseInt(h, 16))
  );
  return decoder.decode(uint8Array);
}
Build Transaction
Now, check out the core function buildMessageTx. It requires two parameters:
- Private Key: Your private key, used for transaction authorization.
- Message: The message you want to write into the Cell.
The function then constructs a transaction to create a new Cell that incorporates the specified message in the data field
export async function buildMessageTx(
  onChainMemo: string,
  privateKey: string
): Promise<string> {
...
}
As always, we first create a transaction using CCC:
const onChainMemoHex = utf8ToHex(onChainMemo);
const tx = ccc.Transaction.from({
  outputs: [{ lock: signerAddress.script }],
  outputsData: [onChainMemoHex],
});
Here we build the output Cell to store the message data by putting the hex format of the text message into the data field of the output Cell.
Next, we ask CCC to complete the transaction for us with a transaction fee:
// Complete missing parts for transaction
await tx.completeInputsByCapacity(signer);
await tx.completeFeeBy(signer, 1000);
Lastly, we use signer to sign and broadcast the transaction to the blockchain network through rpc:
const txHash = await signer.sendTransaction(tx);
Therefore, the message is successfully stored on a Cell and lives in the blockchain.
Read Cell Messages
To read the message we stored on-chain, we need to retrieve the Live Cell we just produced, read the data field from the Cell and decode the message back to the text format.
To retrieve a specific Live Cell, we use the RPC method getLiveCell with OutPoint parameters:
- txHash: The transaction hash from which the Cell originated.
- output Cell index: The position index of the Cell within the transaction's outputs.
Given a specific transaction hash, we can locate the output Cells of the transaction. By knowing the position index of the Cell, we can find out the specific one.
For the way we built the transaction, we know that the Live Cell that carries the message is always the first one of the output Cells. So we set index = "0x0"
export async function readOnChainMessage(txHash: string, index = "0x0") {
  const cell = await cccClient.getCellLive({ txHash, index }, true);
  if (cell == null) {
    return alert("Cell not found, please retry later");
  }
  const data = cell.outputData;
  const msg = hexToUtf8(data);
  alert("read msg: " + msg);
  return msg;
}
Congratulations!
After following this tutorial, you have mastered how storing data on Cells works on CKB. Here's a quick recap:
- We can store arbitrary data in the
datafield of Cell. - We need a way to encode and decode our data for understanding and using our raw on-chain data later.
- To read the storing data, we need to locate the Live Cell that we put our data in. This can be done by querying Cells meets our requirement or by getting the Cell directly with a known
OutPointthrough RPC.
Next Step
Now that your dApp works great on the local blockchain, you might want to switch it to different environments like Testnet or Mainnet.
To do that, simply change the NETWORK environment variable to testnet:
export NETWORK=testnetThen restart the dApp. It should connect to the Testnet automatically.
For more details, check out the full source code.
Additional Resources
- CKB transaction structure: RFC-0022-transaction-structure
- CKB data structure basics: RFC-0019-data-structure